Instructions
The CARELIA GRILL® is a durable and high-quality open fireplace manufactured in North Karelia, Finland. The fireplace is safe and easy to use and you can enjoy the warmth and ambiance created by it without worry. All national, regional, and local rules and regulations must be adhered to regarding the installation and use of the fireplace and the fuel used. To ensure the safety and functionality of the fireplace, always follow the instructions of this manual, unless otherwise required by the previously mentioned regulations.
SAFETY INSTRUCTIONS
Read carefully before using and store in case of emergency.
WARNING! This grill will become very hot. Do not move it during operation!
WARNING! The grill must not be used indoors, except with proper smoke exhaust ventilation e.g. in bbq huts and grill cabins!
WARNING! Do not use spirit or gasoline/petrol for lighting or re-lightning!
Use only firelighters complying to EN 1860-3!
WARNING! Keep children and pets away!
ALWAYS PAY ATTENTION TO THE GENERAL FIRE SAFETY REGULATIONS!
- Sufficient space must be reserved around the grill, while considering the necessary safety, maintenance, and usage distances in accordance with the size and features of the grill.
- Ensure that the grill is placed on a level, stable and non-combustible surface.
- Never use gasoline/petrol or other similarly unsuitable substances to ignite fuel in the fireplace.
- Store lighter fluids, fire starters, and other related paraphernalia away from children.
- Never leave children and pets unsupervised by the fireplace.
- Do not store combustible materials or fluids in the immediate vicinity of the base of the fireplace.
- The fireplace with all its surfaces become HOT during use. Do not touch any unprotected parts without heat-resistant protective gloves. It is safe to use the wooden/steel handles for adjusting the grilling levels.
- Never lean on the fireplace or the hood. To ensure stable and safe use of the fireplace, we always recommend that you secure it to its foundation.
- The fireplace is not intended for burning waste. Never use the fireplace to burn disposable dinnerware, plastic, cardboard, and other such materials that release burning flakes into the surrounding area.
- Preferably, avoid using softwood and highly resinous wood. Hardwoods are the best for burning. Charcoal and briquettes can also be used.
- Always maintain a moderate fire. The maximum height of the flames must not exceed the halfway point between the hearth and the hood. A fire that is too large or hot causes damage to the fireplace and its surrounding area.
- Keep the necessary fire extinguishing media close to the fireplace and advise all users on the correct procedure in case of an emergency.
- Burn fire in the fireplace for at least 30 minutes prior to the first use. Do not cook before the fuel has a coating of ash and any smoky smells which may have been produced during the first use have dissipated.
- Never leave the fireplace unattended when operating. Always be careful when using it.
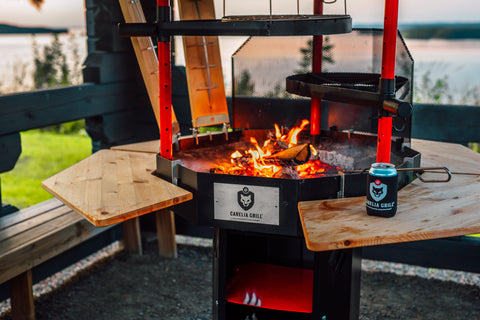
INSTALLATION OUTDOORS (E.G. IN THE GARDEN, ON THE PATIO OR TERRACE)
Please use caution when using fire outdoors!
Foundations
The foundations for the grill must be level, stable and non-combustible. A base of compacted sand/rock dust, paving, or poured concrete provides a solid foundation. The grill/fireplace can also be installed on a wooden terrace or patio as long as the wooden floor is protected with a floor plate. We always recommend that you fasten the fireplace down to the foundation to ensure safe use. The base plate of the grill stand has holes for screws, allowing you to easily attach the grill to the foundation.
Necessary safety distances in outdoor areas
The grill/fireplace must be placed in a safe location, where there is no risk of fire spreading to the environment. Please note that the safety distance from an outdoor fireplace to a residential building must be at least four (4) meters measured from the eave line, unless the fireplace is equipped with a chimney pipe that extends over the building eave line. The horizontal safety distances to other combustible structures must be at least 50 cm to the sides, front, and back. Without separate fireproofing, there must be a minimum of 100 cm clearance in front of the fireplace for both use and maintenance.
The fireplace can be installed on a terrace adjacent to a building, provided that all the safety distances and operational safety are taken into account. Installation on a wooden terrace always requires a non-combustible surface and appropriate protection against wind and sparks, as well as a chimney pipe if necessary. The grill/fireplace can be installed on a separate terrace or patio without additional equipment, while considering the necessary non-combustible surface and safety distance from the residential building.
When properly installed and following the safety guidelines, open fire Carelia Grills can be used even when there is a forest fire warning in force. According to the Finnish Rescue Act, a fire pit separated from the ground is not considered an open fire that can spread along the ground. However, before you use the grill, we strongly recommend that you check your local legislation about placing the open fire grill in an area, where there is an obvious risk of forest fires. Moreover, we do not advise you to use the grill during high winds. The effects of the wind and the risk of sparking can be reduced with the separately available wind and spark guards.
INSTALLATION INDOORS (E.G. IN A BBQ HUT, GRILL CABIN OR KOTA)
Please use caution when using fire indoors!
Necessary safety distances indoors
Without fireproofing, the minimum horizontal safety distances to combustible structures indoors (in a bbq hut, grill cabin or kota) are 50 cm to the sides, front, and back. A clearance of 100 cm must be left at the front for use and maintenance of the fireplace. Combustible structures can be protected with fireproof sheets such that each individual sheet will halve the required safety distance. The fireplace must be placed on a non-combustible surface extending 50 cm beyond its edges that consists of poured concrete, paving, or a floor protection plate.
Necessary make-up air in enclosed buildings
Make-up air is one of the most essential factors in successful smoke exhaust in enclosed buildings to ensure that the space is comfortable and virtually smoke-free. The amount of fresh make-up air must be at least equal to the amount of air escaping with the smoke. Burning fire in an enclosed hut, cabin, or the like creates an air deficit. If the amount of make-up air is insufficient, the smoke will not escape through the chimney because no lift is being generated and the exhaust flow rate of the air decreases. To ensure clean, smoke-free indoor air, both a 30 cm diameter chimney pipe and a sufficient amount of make-up air to replace the exhaust air are therefore needed.
The best way to provide fresh make-up air and proper flow required by an open fire in an enclosed building is to build a radially framed floor, which is left open below the floorboards. A hole with an approximate diameter of 30 cm is made directly under the fireplace from which the airflow rises directly to the grate, thus ensuring effective and controlled steady flow into the fireplace. During burning, the flow increases while creating an upward draft required for clean combustion. Another effective means is to embed make-up air tubes into the building’s foundation or concrete pour. The diameter of each tube should be at least 100-150 mm and there should be a minimum of three tubes pointing in different directions. To ensure an effective draft, the tubes should be positioned as much towards the fireplace as possible, since there will be no proper airflow in horizontal tubes.
Installing the chimney pipes
-
The roof of the building must have a hole with an approximate diameter of 38 cm for the mounting casing. Place the assembled grill with its hood under the chimney hole (Ø ~ 380 mm) in the roof.
-
Tighten the larger collar, i.e. the support collar to the groove at the top of the mounting casing. The clamp is passed through the clamp hole in the collar, tightened properly and locked into place by turning it back over the clamp hole so that the collar cannot loosen.
-
Pass the mounting casing from above the roof to hang by the collar.
-
Lower the chimney pipes from the roof and attach them to each other and the hood so that the straight end of the lower pipe is on top of the reduction. The weight of the pipe is sufficient to keep it in place. The holes at the end of the lower pipe are covered inside the upper pipe. The holes visible at the top are for fastening the rain cap.
-
Fasten the rain cap to the pipe with screws.
-
Install the smaller collar, i.e. the rain collar, on the top of the sheet metal panels coming over the top of the mounting casing. The purpose of the rain collar is to prevent rain water from flowing between the pipe and the mounting casing.
-
Carefully seal the joint between the rain collar and the chimney with weather, UV radiation, and heat resistant silicone sealant or insulator.
When installing the grill in a grill house, cabin or hut, it is vitally important to follow the fire regulations. Here are some points that should be considered:
- The mounting casing must reach a minimum of 300 mm down from the nearest combustible roof material and correspondingly, there must be a minimum of 100 mm of clearance above.
- The length of the chimney is dependent on the steepness of the roof and the ridge height, but the end of the chimney pipe must be located at least 80 cm from the nearest combustible roof material.
- A non-insulated, single mounting casing can only be used in non-insulated buildings or buildings without a dropped ceiling. If you plan to install the fireplace in a building with heat insulation or a dropped ceiling, you will need a custom-made fire insulated mounting casing. It is available as an option.
-
Fire regulations also require that there is a non-combustible foundation, i.e. concrete pour, paving or a floor protection plate, under the fireplace extending to 500 mm outside of its edges. Floor plates are available as an option.
Please pay special attention to safety when using fire indoors!
Check our installation video here: Installation of a Carelia Grill in a Kota
MAINTENANCE
When the fireplace and ash drawer have cooled completely after use (below 45 °C / 115 °F), clean them from fire debris. The ash drawer should be emptied from the ashes regularly so that they do not prevent the flow of make-up air into the fireplace. Keep in mind that hot embers may remain within the ashes even for 24 hours after combustion. The cold ashes should be taken out to an ash container made of non-combustible material.
Wood ashes are environmentally friendly and can be used as soil improver and fertilizer. The ashes can also be put in a compost, but before doing so, they must be covered with water as smouldering residues may cause a second combustion.
When necessary and especially for storage, after cleaning the grill, the fire surfaces can be oiled with cooking oil to protect the surfaces from corrosion. Do not use chemicals or other unsuitable materials to protect the surfaces.
WARRANTY
The manufacturer provides a limited warranty for work and materials regarding Carelia Grill® products with the following conditions:
- The period of warranty is two years (24 months) from the date of purchase.
- The warranty is provided on the condition that the place and date of purchase have been reliably identified.
- The warranty covers work and material defects noticed during the warranty period.
THE WARRANTY DOES NOT COVER
- Damages caused by user error, carelessness, insufficient maintenance or other external factors.
- Transport or travel costs or other indirect costs.
THE PROCEDURE IN THE EVENT OF LACK OF CONFORMITY
The manufacturer will repair the product to the condition preceding the defect.
Repair under warranty does not extend the warranty period of the product or the subject of the repairs.
The buyer shall notify the seller or manufacturer within a reasonable period from the time they have noticed the defect or should have noticed it. Reasonable period is normally considered to be 14 days. This warranty does not restrict the rights that the buyer has according to the Consumer Protection Act based on the defect.
CARELIA GRILL® CAST IRON PAN USE & CARE GUIDE
Carelia Grill® Cast Iron Pan is suitable for many uses after seasoning it well. The cooking surface of the pan will improve with use over time. Prior to the first use, make sure to do the following:
- Wash the pan with warm water and a stiff brush.
- Boil a small amount of water in the pan to release any manufacturing impurities.
- Rinse the pan and dry it thoroughly.
- Lightly grease the pan, e.g. with vegetable oil or lard.
- Wipe off excess grease with a soft cloth or paper towel.
- Heat the greased pan until it starts to smoke.
- Allow the pan cool.
- The pan is now ready for use!
To have a well-seasoned pan with a good nonstick cooking surface, we recommend repeating the steps 4-7 at least twice, preferably three times. After use, clean the pan by wiping it with a paper towel or cloth. Never use chemical cleaners to clean the pan. Always remove food residues mechanically and, if necessary, wash with warm water and scrub gently with a stiff brush. After cleaning, oil the pan again.
Store the pan in a warm, dry place. Before a long-term storage, brush the pan’s surface with lard to prevent rusting. If rust has formed on the pan, it can be removed with steel wool or, for example, cast iron cleaning pads. After removing the rust, repeat the previous first use steps starting from number 1.
Get inspired with our tasty grilling recipes and enjoy the lifestyle.